Showing posts with label Japanese Recipes. Show all posts

Saturday, April 30, 2016

Green Onion Kimchi Fried Rice

Hi Everyone,

So I know this recipe isn't Japanese but...I had kimchi...lots of kimchi and I thought I'd start getting to use some up. Now I love the classic Napa cabbage kimchi but my other two favorite are green onion kimchi and garlic scape kimchi.

This recipe is versatile and you can use any of the above mentioned types of kimchi in it. You can also try other kinds, if you do let me know what kind you used and how it went ^_^


I need to find ways to use this sucker up, I wish the Korean grocery store sold smaller jars.


This will serve one very hungry otaku, you'll need:

1 cup of cooked japonica rice
1/2 cup green onion kimchi, cut into bite sized pieces
pinch of sugar
pinch or two of salt
1/8 TSP of black pepper
2 TBS of green onion kimchi juice (don't worry it'll be in the jar with the kimchi)
1 egg, lightly beaten
1/2 TSP sesame oil
2 TBS vegetable oil
green onion (fresh) thin slices (optional)

When it comes to making fried rice you can make it with piping hot fresh out of the rice cooker rice, but I prefer using older rice. By older rice I mean oh I made rice at lunch and now I have leftovers for dinner or day/2 day old rice, where it's had some time to lose some of its moisture.

In a heated pan (medium to medium high heat) add 1 TBS of vegetable oil and swirl to coat.
Add your kimchi and stir fry, I like to have the moisture evaporate.
The pieces of kimchi sort of look like they got smaller.


At this point add the rest of the vegetable oil and the rice. You'll slowly break up the rice with your spatula.


The more you do this and stir the rice with the kimchi to combine it'll change color a bit and pick up the red from the kimchi. Now add your salt, pepper, sugar, and kimchi juice, gently stir.
The rice will pick up some more color now let the liquid evaporate.
The rice will be absorbing all the tasty flavors.

Add your sesame oil and give the rice a stir.
Once that is added make a little divot/hole in the center of the pan.
Add your egg in the center, allow it slightly cook at the bottom.
You then want to coat your rice in the egg.


It's sort of the same idea as when you're making a divot when working with dough.


You just let the rice and egg cook (no more runny egg anywhere) 
Now you can plate your delicious kimchi fried rice, Sprinkle on some green onion slices if you want. I know I did ^__^


So this is what I made for dinner tonight, kimchi smells rather pungent when you take it out of the container but it stops when you start cooking it, and it creates a nice flavor. I so had this with some pre-made frozen egg rolls. I was such a lazy girl tonight.

I was originally going to post my recipe for Green Goddess Chicken Sandwich. I know not Japanese but so very tasty but....I realized I ran out of chicken so that ruined that idea but just for reference.
I took a picture when I was testing it for the first time before I added lettuce and put the other piece of bread on top. 

COMING SOON:


If you have any recipe requests please leave a comment ^__^
I hope you give my kimchi fried rice recipe a try.

Saturday, April 2, 2016

Chicken Nira

Hi Everyone,

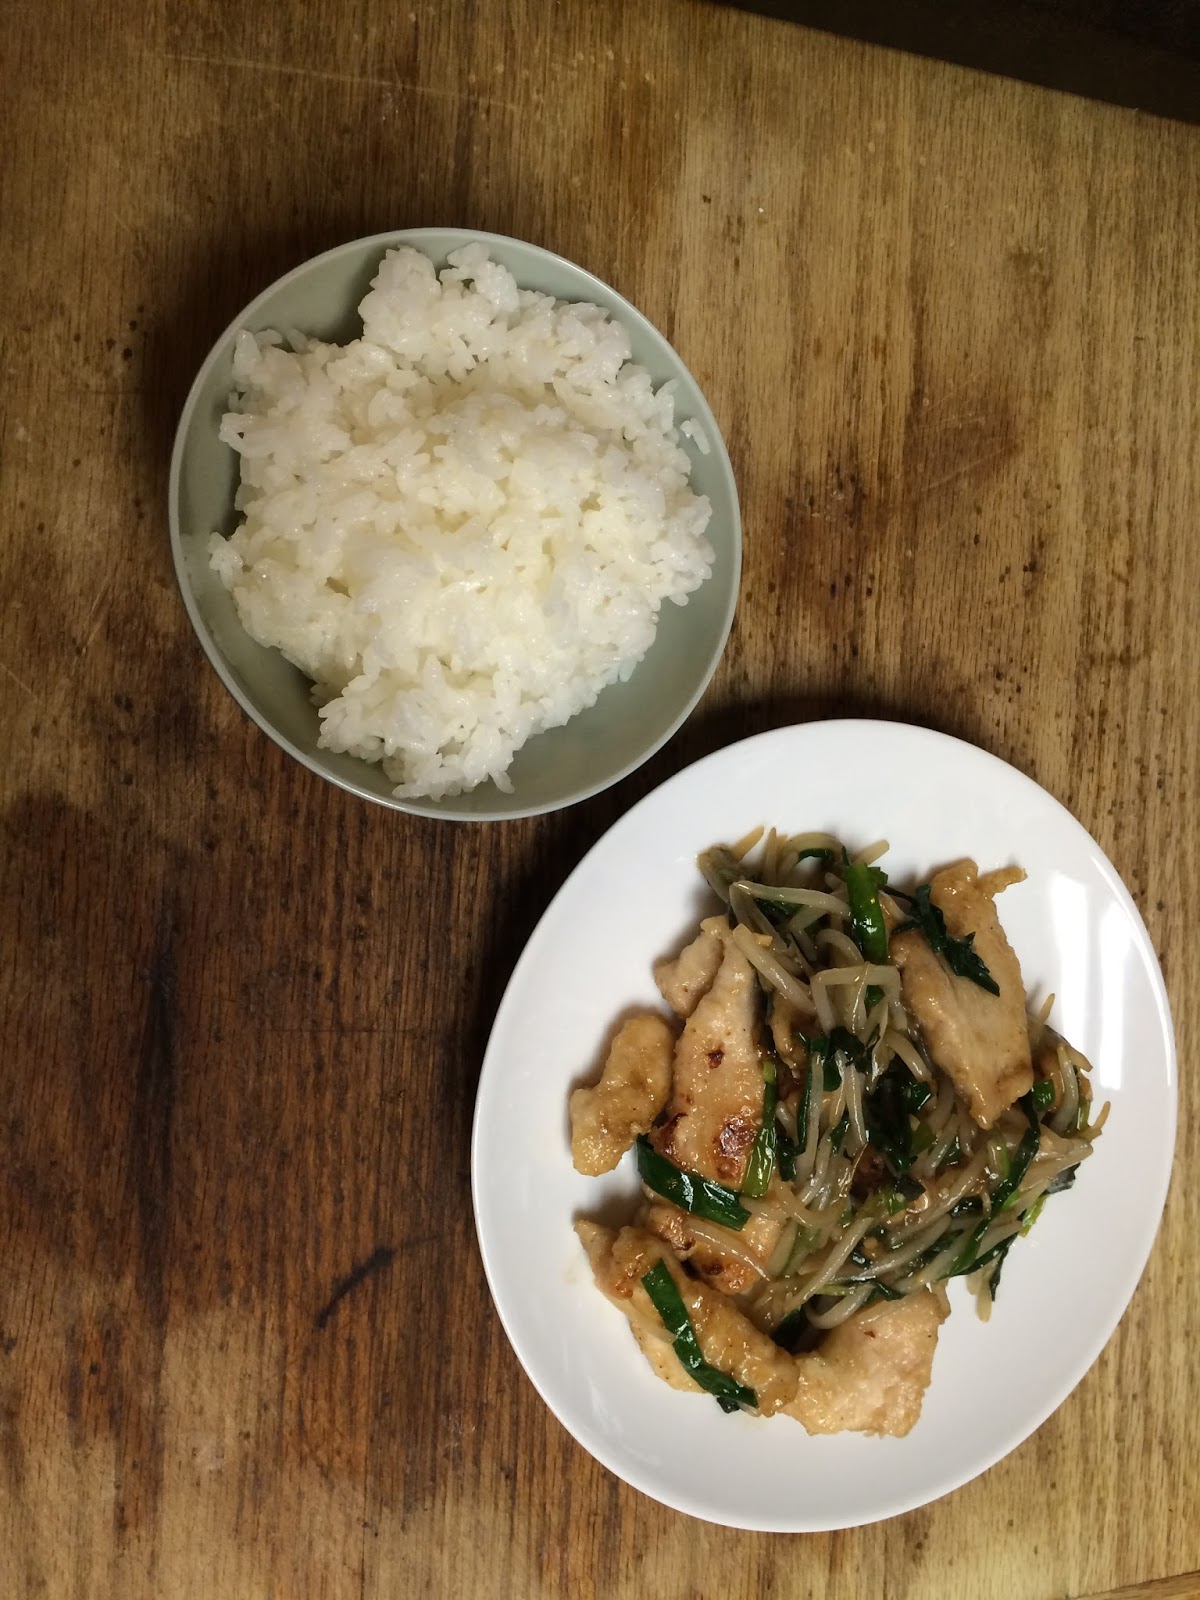
For dinner today I made Chicken Nira.
I found a bunch of recipes online for Reba Nira which is Liver and Garlic Chives.
I've always wanted to try this dish but due to having high cholesterol.....I need to avoid it like the plague. So instead I chose to make this dish with Chicken.

This recipe I made from watching and looking up various versions of reba nira I hope you like it.
This should serve 1-2 people, just depends on how hungry you are.

You'll need:

1 chicken breast cut into thin strips.
2 cups of bean sprouts
approximately 1 cup of nira/garlic chives
2 TBS potato starch
1 TSP minced garlic
1/2 TSP ginger paste
2 TBS vegetable oil
2 TBS sesame oil (if you do not have this use vegetable oil)


For the Marinade:
1 TSP ginger paste
1 TSP sake
1 TSP shoyu (soy sauce)
dash of pepper

Sauce:
1 TBS shoyu (soy sauce)
1 TBS sake
1 tsp oyster sauce
1/4 tsp potato starch
dash of pepper

First make sure your bean sprouts are nice and clean. I tend to remove the little sprouty leafy head things on the ends. Also cut your nira into about 2 inch pieces.


Rinse your chicken in water and pat dry with a paper towel.
Thinly slice your chicken.

Mix the ingredients for your marinade together and mix into the chicken.
You can let this sit for a minimum for 10-15 minutes.
I was making rice at the time and it had an hour to go so I let it marinate for about 40 minutes.

After that put 2 TBS potato starch on a plate and gently coat your pieces of chicken.

In a frying pan put about 1-2 TBS of vegetable oil and swirl to coat the pan.
Add your chicken pieces and brown on each side. Once done set the chicken aside.
For the entire cooking process I use the temperature between Medium to Medium High.
Now to the pan add 1-2 TBS of Sesame Oil, if you don't have this you can use vegetable oil again.
Sesame oil just adds a bit of extra flavor to it.
Add your minced garlic and ginger paste. Saute until aromatic.
Add your bean sprouts and gently stir fry.
After about 2 minutes add the nira.
Once the nira start to look like they're beginning to wilt a bit add the chicken back into the pan.
Heat up the chicken.


Mix up the ingredients for your sauce.
Make sure before you add it to the chicken mixture that you stir it.
Potato Starch has a tendency to sink to the bottom.

Gently stir everything until the sauce begins to thicken.
Now it's ready to serve.


I hope you give this recipe a try ^___^
As always if you have any requests please let me know.


Feta Cheese Tamagoyaki

This summary is not available. Please click here to view the post.

Wednesday, March 30, 2016

Onigirazu #1 Hamburger

Hi Everyone,


Today I decided to make my second attempt ever at Onigirazu.
Onigirazu is similar to Onigiri. Onigirazu, instead of shaping it with your hands (which is what the Nigiru means), you simply sandwich it between nori. The ZU in Onigirazu is a negative, to say it's not shaped with the hands....my knowledge of Japanese is limited. I'm going to hope Emily shares some notes T.T

I figured since I had the ingredients for a hamburger it'd be the first one I'd make for you guys.
You can choose whatever fillings you like for onigirazu and I hope to be adding a few more filling ideas in the future.

Anyway here we go!

To make 2 Onigirazu you'll need:

Cling wrap
onigirazu shaper (OPTIONAL)
Approximately 2 cups of japanese cooked rice, hot and seasoned with salt (to your taste).
2 sheets of nori
Approximately 1/4 pound of ground beef (you can use other kinds of meat if you don't like beef)
1 slice of processed cheese (I chose white processed cheese because I keep hearing it's seen a lot at Japanese grocery stores)
1-2 thin slices of tomato
1-2 thin slices of onion
Kewpie Mayo
1 lettuce leaf (I was going to put this in mine but.... I kinda over filled them...and couldn't fit it in)

                                                 
 Other options: whatever you like putting on a burger ^.^ I                                                                 was tempted to buy an avocado for this...ya ya I know "ew!"


Shape your ground meat of choice and cook, after I took this picture I put cheese on them
I was cooking burgers for dinner at the time too, so the bigger ones were definitely not for onigirazu.


First lay down a piece of nori sheet and put a thin layer of rice if using a shaper try to gauge how much filling you plan to put in and try to adjust the amount of rice. Those free handing it, make a thin layer of rice on the nori, when I made it without a shaper I aimed for a square shape.


Add your fillings
....I kind of over filled mine this time....hey I was hungry

Then add another thin layer of rice.
If you have the shaper you'll use the little mold pusher to flatten the onigirazu down a bit, pretty much the same if you use an onigiri mold when you make onigiri.


Then fold up the onigirazu, this one i had too close to the end, i suggest putting it in the center.
Wrap in Cling wrap and let it sit for a while. This is to let the nori soften up.

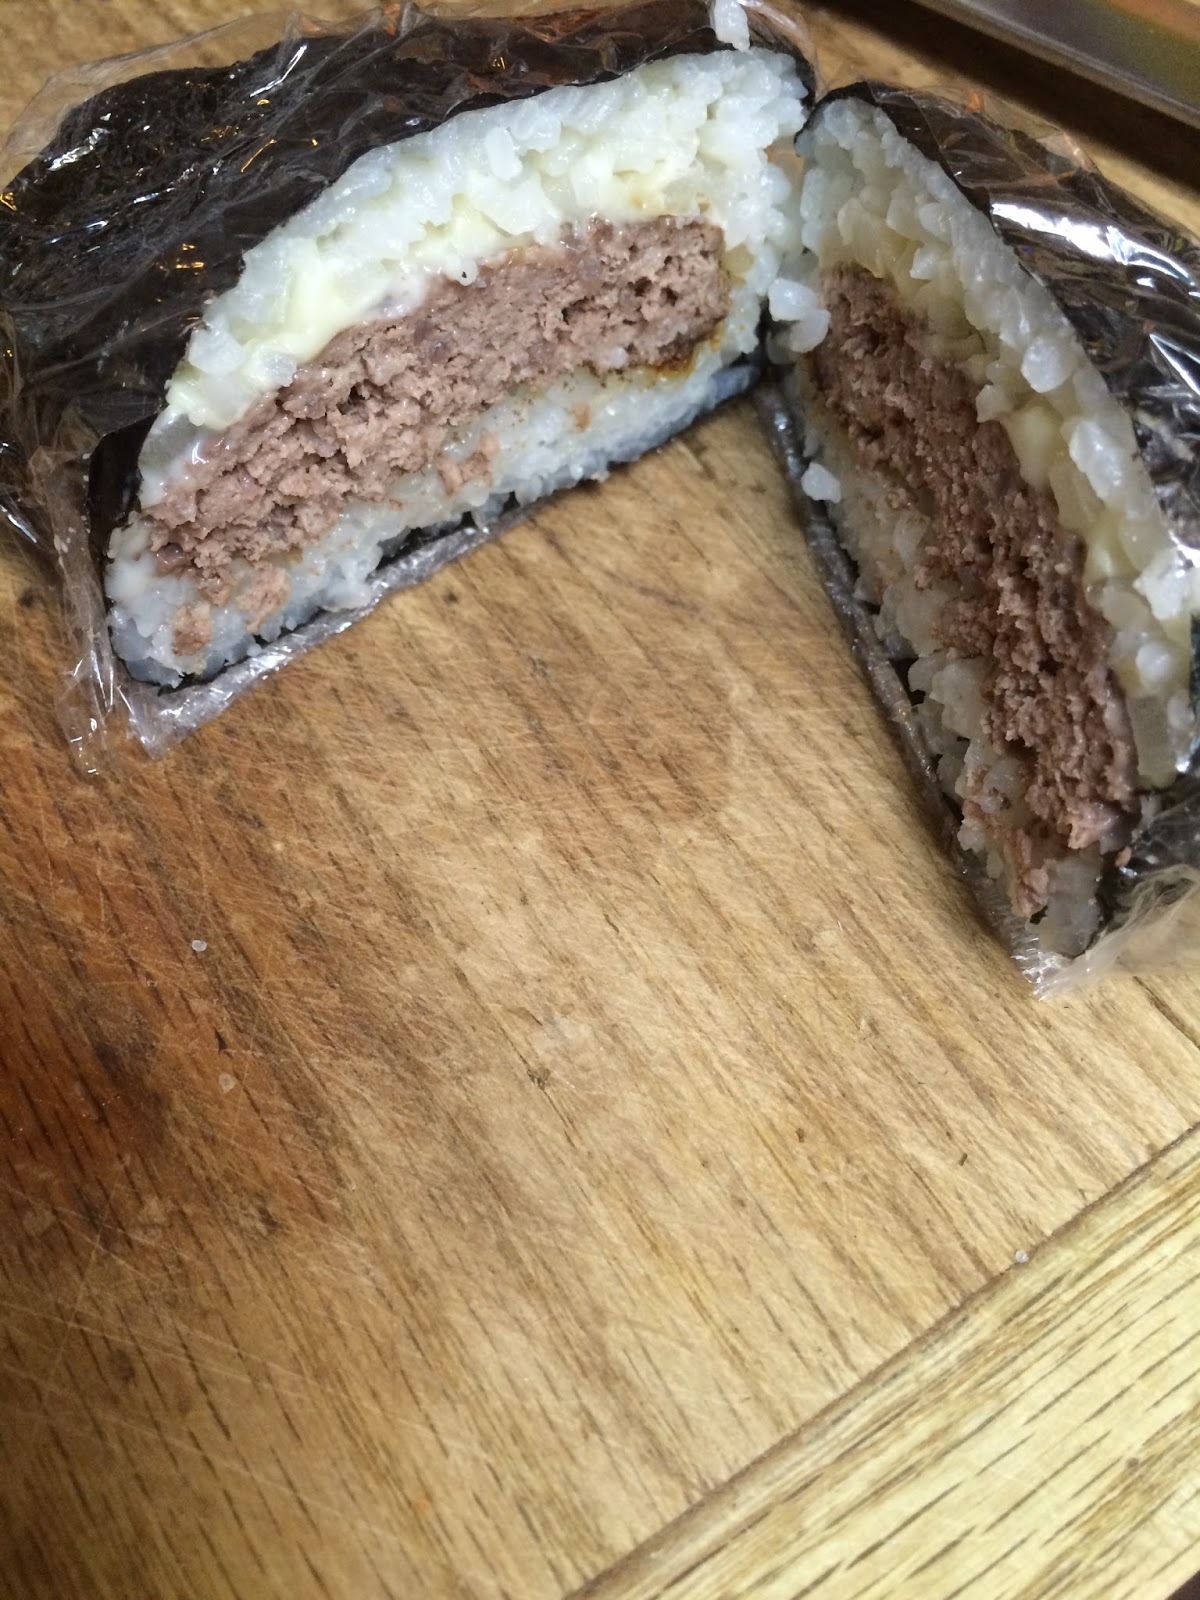
 ...mine looks so ugly T.T but he'll be tasty I just know it.

After about 10 minutes or so take a sharp knife and cut it in half. Remove the cling wrap after cutting.


Put it in your bento and let it completely cool before putting on the lid.
And now it's done ^.^


Don't you just love Totoro?
.....what?....I'm not the only 28 year old with a Totoro bento
....that's my story and I'm sticking to it


I hope you try this for yourself. Like always if you have an requests please leave me a comment and I'll try my best ^_^